SpringBoot 自动配置源码探究
Spring Boot的自动配置机制是其核心特性之一,旨在减少开发人员的配置工作。通过自动配置,Spring Boot可以根据项目依赖和环境配置自动地配置Spring应用。
从@SpringBootApplication开始
用于测试的启动类代码:
1@SpringBootApplication
2public class SpringBootApplicationG {
3	public static void main(String[] args) {
4		SpringApplication.run(SpringBootApplicationG.class, args);
5	}
6
7}
SpringBoot启动类的入口注解@SpringBootApplication
 1@Target(ElementType.TYPE)
 2@Retention(RetentionPolicy.RUNTIME)
 3@Documented
 4@Inherited
 5@SpringBootConfiguration
 6@EnableAutoConfiguration
 7@ComponentScan(
 8		excludeFilters = {
 9				@Filter(type = FilterType.CUSTOM, classes = TypeExcludeFilter.class),
10				@Filter(type = FilterType.CUSTOM, classes = AutoConfigurationExcludeFilter.class)
11		}
12)
13public @interface SpringBootApplication {
14    // ...
15}
@SpringBootApplication注解实际上等价于使用下面三个注解:
@SpringBootConfiguration@EnableAutoConfiguration@ComponentScan
所以上面的启动类代码也可以改成下面的样子启动:
 1@SpringBootConfiguration
 2@EnableAutoConfiguration
 3@ComponentScan(
 4		excludeFilters = {
 5				@Filter(type = FilterType.CUSTOM, classes = TypeExcludeFilter.class),
 6				@Filter(type = FilterType.CUSTOM, classes = AutoConfigurationExcludeFilter.class)
 7		}
 8)
 9public class SpringBootApplicationG {
10	public static void main(String[] args) {
11		SpringApplication.run(SpringBootApplicationG.class, args);
12	}
13}
其中起到自动配置类作用的就是@EnableAutoConfiguration,看名字就知道“打开自动配置功能“。但是如果我们去掉@EnableAutoConfiguration注解之后就会抛出下面的异常了,无法启动web server,找不到ServletWebServerFactory这个bean。
1org.springframework.context.ApplicationContextException: Unable to start web server; nested exception is org.springframework.context.ApplicationContextException: Unable to start ServletWebServerApplicationContext due to missing ServletWebServerFactory bean.
2	at org.springframework.boot.web.servlet.context.ServletWebServerApplicationContext.onRefresh(ServletWebServerApplicationContext.java:148) ~[main/:na]
Tomcat自动配置
进入run()方法:
1public ConfigurableApplicationContext run(String... args) {
2    // ...
3    // 刷新Spring容器, 会解析配置类、扫描、启动WebServer
4    refreshContext(context);
5
6    // ...
7}
进入refreshContext(context)方法:
1protected void refresh(ConfigurableApplicationContext applicationContext) {
2    applicationContext.refresh();
3}
该方法内部会调用applicationContext.refresh()方法,直接就触发了Spring容器的刷新机制,而在Spring容器的刷新过程中,留有一个一个扩展口,留给其他容器来扩展的方法:onRefresh();
 1public void refresh() throws BeansException, IllegalStateException {
 2    synchronized (this.startupShutdownMonitor) {
 3        // ...
 4
 5        // Initialize other special beans in specific context subclasses.
 6        onRefresh();
 7
 8        // ...
 9    }
10}
而在SpringBoot中对该方法的实现正视在ServletWebServerApplicationContext中实现的,代码如下:
 1@Override
 2protected void onRefresh() {
 3    super.onRefresh();
 4    try {
 5        // ☆ ->
 6        // 启动tomcat
 7        createWebServer();
 8    } catch (Throwable ex) {
 9        throw new ApplicationContextException("Unable to start web server", ex);
10    }
11}
从上面的代码中可以知道,启动WebServer的入口从这里开始。
ServletWebServerApplicationContext.java
 1private void createWebServer() {
 2		WebServer webServer = this.webServer;
 3		ServletContext servletContext = getServletContext();
 4		if (webServer == null && servletContext == null) {
 5			StartupStep createWebServer = this.getApplicationStartup().start("spring.boot.webserver.create");
 6			ServletWebServerFactory factory = getWebServerFactory();
 7			createWebServer.tag("factory", factory.getClass().toString());
 8			this.webServer = factory.getWebServer(getSelfInitializer());
 9			createWebServer.end();
10			getBeanFactory().registerSingleton("webServerGracefulShutdown", new WebServerGracefulShutdownLifecycle(this.webServer));
11			getBeanFactory().registerSingleton("webServerStartStop", new WebServerStartStopLifecycle(this, this.webServer));
12		} else if (servletContext != null) {
13			try {
14				getSelfInitializer().onStartup(servletContext);
15			} catch (ServletException ex) {
16				throw new ApplicationContextException("Cannot initialize servlet context", ex);
17			}
18		}
19		initPropertySources();
20	}
ServletWebServerFactory

从这个接口的实现关系可以看到,对应的正好是SpringBoot所自带支持的三种web容器:
TomcatServletWebServerFactoryJettyServletWebServerFactoryUndertowServletWebServerFactory
这三个Factory中户创建并启动web容器。比如TomcatServletWebServerFactory:
TomcatServletWebServerFactory.java
 1@Override
 2public WebServer getWebServer(ServletContextInitializer... initializers) {
 3    if (this.disableMBeanRegistry) {
 4        Registry.disableRegistry();
 5    }
 6    Tomcat tomcat = new Tomcat();
 7    File baseDir = (this.baseDirectory != null) ? this.baseDirectory : createTempDir("tomcat");
 8    tomcat.setBaseDir(baseDir.getAbsolutePath());
 9    for (LifecycleListener listener : this.serverLifecycleListeners) {
10        tomcat.getServer().addLifecycleListener(listener);
11    }
12    Connector connector = new Connector(this.protocol);
13    connector.setThrowOnFailure(true);
14    tomcat.getService().addConnector(connector);
15    customizeConnector(connector);
16    tomcat.setConnector(connector);
17    tomcat.getHost().setAutoDeploy(false);
18    configureEngine(tomcat.getEngine());
19    for (Connector additionalConnector : this.additionalTomcatConnectors) {
20        tomcat.getService().addConnector(additionalConnector);
21    }
22    prepareContext(tomcat.getHost(), initializers);
23    return getTomcatWebServer(tomcat);
24}
25
26
27protected TomcatWebServer getTomcatWebServer(Tomcat tomcat) {
28    return new TomcatWebServer(tomcat, getPort() >= 0, getShutdown());
29}
getWebServer()该方法中对Tomcat的部分参数进行了设置。
getTomcatWebServer()方法中创建了一个TomcatWebServer对象,在该对象的构造方法中会调用initialized()方法,最总会走到this.tomcat.start();方法正式启动Tomcat容器。
如何选择容器
在上面提到的ServletWebServerApplicationContext#createWebServer这个方法中有一个getWebServerFactory()方法会去从Spring容器中获取ServletWebServerFactory自动配置类:
 1protected ServletWebServerFactory getWebServerFactory() {
 2    String[] beanNames = getBeanFactory().getBeanNamesForType(ServletWebServerFactory.class);
 3    if (beanNames.length == 0) {
 4        throw new ApplicationContextException("Unable to start ServletWebServerApplicationContext due to missing ServletWebServerFactory bean.");
 5    }
 6    if (beanNames.length > 1) {
 7        throw new ApplicationContextException("Unable to start ServletWebServerApplicationContext due to multiple ServletWebServerFactory beans : " + StringUtils.arrayToCommaDelimitedString(beanNames));
 8    }
 9    return getBeanFactory().getBean(beanNames[0], ServletWebServerFactory.class);
10}
根据ServletWebServerFactory这个名字,按规律全局搜索可以找到一个ServletWebServerFactoryAutoConfiguration,这是一个自动配置类:

从这个自动配置类中:
 1@Configuration(proxyBeanMethods = false)
 2@AutoConfigureOrder(Ordered.HIGHEST_PRECEDENCE)
 3@ConditionalOnClass(ServletRequest.class)
 4@ConditionalOnWebApplication(type = Type.SERVLET)
 5@EnableConfigurationProperties(ServerProperties.class)
 6@Import({
 7		ServletWebServerFactoryAutoConfiguration.BeanPostProcessorsRegistrar.class,
 8
 9		ServletWebServerFactoryConfiguration.EmbeddedTomcat.class,
10		ServletWebServerFactoryConfiguration.EmbeddedJetty.class,
11		ServletWebServerFactoryConfiguration.EmbeddedUndertow.class
12})
13public class ServletWebServerFactoryAutoConfiguration {
14    // ....
15}
-
@Configuration(proxyBeanMethods = false):声明这是一个配置类,并禁用代理 bean 方法以提高性能。 -
@AutoConfigureOrder(Ordered.HIGHEST_PRECEDENCE):设置自动配置的顺序为最高优先级,以确保此配置在其他自动配置之前应用。 -
@ConditionalOnClass(ServletRequest.class):仅在类路径上存在ServletRequest类时才启用此配置,确保这是一个 Servlet 环境。 -
@ConditionalOnWebApplication(type = Type.SERVLET):仅在应用程序类型为 Servlet 的 Web 应用时才启用此配置。 -
@EnableConfigurationProperties(ServerProperties.class):启用ServerProperties配置属性,以便于通过配置文件(如application.properties或application.yml)进行配置。 -
@Import:导入其他必要的配置类:-
ServletWebServerFactoryAutoConfiguration.BeanPostProcessorsRegistrar:用于注册BeanPostProcessor。 -
ServletWebServerFactoryConfiguration.EmbeddedTomcat:嵌入式 Tomcat 配置。 -
ServletWebServerFactoryConfiguration.EmbeddedJetty:嵌入式 Jetty 配置。 -
ServletWebServerFactoryConfiguration.EmbeddedUndertow:嵌入式 Undertow 配置。
-
其中ServletWebServerFactoryConfiguration.EmbeddedTomcat和其他两个都是静态内部类,内容如下
 1@Configuration(proxyBeanMethods = false)
 2@ConditionalOnClass({ Servlet.class, Tomcat.class, UpgradeProtocol.class })
 3@ConditionalOnMissingBean(value = ServletWebServerFactory.class, search = SearchStrategy.CURRENT)
 4static class EmbeddedTomcat {
 5
 6    @Bean
 7    TomcatServletWebServerFactory tomcatServletWebServerFactory(
 8        ObjectProvider<TomcatConnectorCustomizer> connectorCustomizers,
 9        ObjectProvider<TomcatContextCustomizer> contextCustomizers,
10        ObjectProvider<TomcatProtocolHandlerCustomizer<?>> protocolHandlerCustomizers
11    ) {
12        TomcatServletWebServerFactory factory = new TomcatServletWebServerFactory();
13        factory.getTomcatConnectorCustomizers().addAll(connectorCustomizers.orderedStream().collect(Collectors.toList()));
14        factory.getTomcatContextCustomizers().addAll(contextCustomizers.orderedStream().collect(Collectors.toList()));
15        factory.getTomcatProtocolHandlerCustomizers().addAll(protocolHandlerCustomizers.orderedStream().collect(Collectors.toList()));
16        return factory;
17    }
18
19}
当容器中存在下面的情况的时候才会想Spring中注册tomcatServletWebServerFactory这个Bean:
- 类加载路径中中存在
Servlet.class,Tomcat.class,UpgradeProtocol.class这三个class。 - 容器中不存在
ServletWebServerFactory。
同时在参数中需要依赖于三个参数TomcatConnectorCustomizer,TomcatContextCustomizer,TomcatProtocolHandlerCustomizer,
这些类都是用来自定义Tomcat的,用法如下:
 1@Bean
 2public TomcatConnectorCustomizer tomcatConnectorCustomizer() {
 3    return new TomcatConnectorCustomizer() {
 4        @Override
 5        public void customize(org.apache.catalina.connector.Connector connector) {
 6            connector.setPort(9123);
 7        }
 8    };
 9}
10
11// 启动日志输出:
12// Tomcat started on port(s): 9123 (http) with context path ''
这样可以对Tomcat的一些配置进行自定义,但是我们一般在yaml文件中配置,而不是使用这种方式。
这样配置为什么能起到作用呢,那就需要去看下这些Customizer的后续逻辑了。在上面提到的getWebServer()这个方法中有一个customizeConnector(connector);方法,进入这个方法之后,在这个方法的底部我们可以看到,调用了所有的ConnectCustomizer的customize()方法进行了属性设置,这里会覆盖掉yaml文件中的配置。
 1@Override
 2public WebServer getWebServer(ServletContextInitializer... initializers) {
 3    // ...
 4    customizeConnector(connector);
 5    tomcat.setConnector(connector);
 6    tomcat.getHost().setAutoDeploy(false);
 7    // ...
 8    prepareContext(tomcat.getHost(), initializers);
 9    return getTomcatWebServer(tomcat);
10}
ServletWebServerFactoryAutoConfiguration除了会导入三个和容器类,还会加入一个Registar:就是ServletWebServerFactoryAutoConfiguration.BeanPostProcessorsRegistrar,那么Spring在启动的时候就会调用该类的registerBeanDefinitions()方法,而它的这个方法又向容器中注册了一个BeanPostProcessor:WebServerFactoryCustomizerBeanPostProcessor。
ServletWebServerFactoryAutoConfiguration.BeanPostProcessorsRegistrar#registerBeanDefinitions
 1@Override
 2public void registerBeanDefinitions(AnnotationMetadata importingClassMetadata,
 3                                    BeanDefinitionRegistry registry) {
 4    if (this.beanFactory == null) {
 5        return;
 6    }
 7    registerSyntheticBeanIfMissing(
 8        registry, "webServerFactoryCustomizerBeanPostProcessor",
 9        WebServerFactoryCustomizerBeanPostProcessor.class,
10        WebServerFactoryCustomizerBeanPostProcessor::new
11    );
12
13    registerSyntheticBeanIfMissing(
14        registry,
15        "errorPageRegistrarBeanPostProcessor",
16        ErrorPageRegistrarBeanPostProcessor.class,
17        ErrorPageRegistrarBeanPostProcessor::new
18    );
19}
当WebServerFactoryCustomizerBeanPostProcessor被注册成功之后,Spring就会在启动过程中的Bean的初始化之前或者之后来调用它的对应的方法:
 1@Override
 2public Object postProcessAfterInitialization(Object bean, String beanName) throws BeansException {
 3    return bean;
 4}
 5
 6@SuppressWarnings("unchecked")
 7private void postProcessBeforeInitialization(WebServerFactory webServerFactory) {
 8    LambdaSafe.callbacks(
 9        WebServerFactoryCustomizer.class,
10        getCustomizers(),
11        webServerFactory
12    )
13        .withLogger(WebServerFactoryCustomizerBeanPostProcessor.class)
14        .invoke(
15        // ☆ ->
16        // ServletWebServerFactoryCustomizer 读取配置配置文件中server相关的
17        (customizer) -> customizer.customize(webServerFactory)
18    );
19}
从上面的代码中可以看出来,后置方法没有逻辑,而前置方法做的主要内容就是调用ServletWebServerFactoryCustomizer.customize()方法,来完成server相关的配置读取和设置。
条件注解
SpringBoot中为我们提供了很多的条件注解,其中主要有下面的几个:
| 注解 | 作用 |
|---|---|
@ConditionalOnBean |
当指定的 bean 存在时,才会加载当前配置。 |
@ConditionalOnClass |
当指定的类存在于类路径时,才会加载当前配置。 |
@ConditionalOnCloudPlatform |
当应用程序运行在特定的云平台时,才会加载当前配置。 |
@ConditionalOnExpression |
根据 SpEL 表达式的结果来决定是否加载当前配置。 |
@ConditionalOnJava |
当运行的 Java 版本满足指定要求时,才会加载当前配置。 |
@ConditionalOnJndi |
当指定的 JNDI 资源存在时,才会加载当前配置。 |
@ConditionalOnMissingBean |
当指定的 bean 不存在时,才会加载当前配置。 |
@ConditionalOnMissingClass |
当指定的类不存在于类路径时,才会加载当前配置。 |
@ConditionalOnNotWebApplication |
当当前应用程序不是 Web 应用时,才会加载当前配置。 |
@ConditionalOnProperty |
当指定的属性有特定值时,才会加载当前配置。 |
@ConditionalOnResource |
当指定的资源存在时,才会加载当前配置。 |
@ConditionalOnSingleCandidate |
当指定的 bean 在上下文中是唯一候选者时,才会加载当前配置。 |
@ConditionalOnWarDeployment |
当应用程序作为 WAR 部署时,才会加载当前配置。 |
@ConditionalOnWebApplication |
当当前应用程序是 Web 应用时,才会加载当前配置。 |
如果只是简单的额需要一个条件注解,我们可以直接继承SpringBootCondition,实际上SpringBootCondition这个类最后还是实现了Condition接口的,然后重写它的match()方法。
在SpringBoot的条件注解中很多并不是直接继承自SpringBootCondition,而是中间还有其他的一些实现类。判断是否满足条件就是在这个类的matches()方法中判断的。
 1public final boolean matches(ConditionContext context, AnnotatedTypeMetadata metadata) {
 2    // 针对每个条件注解进行条件判断
 3
 4    // 条件注解写在了哪个类上, 或者哪个方法上
 5    String classOrMethodName = getClassOrMethodName(metadata);
 6    try {
 7        // ☆ ->
 8        // 条件的判断结果
 9        // OnBeanCondition / OnClassCondition
10        ConditionOutcome outcome = getMatchOutcome(context, metadata);
11
12        // 如果log的日志级别为trace, 则记录当前的判断结果
13        logOutcome(classOrMethodName, outcome);
14
15        // 将判断结果记录到ConditionEvaluationReport中
16        // ConditionEvaluationReportLoggingListener 会在收到ContextRefreshedEvent事件后把判断结果用日志的方式打印出来
17        recordEvaluation(context, classOrMethodName, outcome);
18
19        return outcome.isMatch();
20    } catch (NoClassDefFoundError ex) {
21        throw new IllegalStateException("Could not evaluate condition on " + classOrMethodName + " due to " + ex.getMessage() + " not found. Make sure your own configuration does not rely on that class. This can also happen if you are @ComponentScanning a springframework package (e.g. if you put a @ComponentScan in the default package by mistake)", ex);
22    } catch (RuntimeException ex) {
23        throw new IllegalStateException("Error processing condition on " + getName(metadata), ex);
24    }
25}
第10行返回的ConditionOutcome中有两个属性:
boolean match:表示是否能匹配上ConditionMessage message:记录了如果匹配不上,是缺少那些条件。
代码中的getMatchOutcome(context, metadata)是一个模板方法,交个子类去实现的,比如说下面提到的OnClassCondition中的getMatchOutcome()方法。
logOutcome(classOrMethodName, outcome);方法和 recordEvaluation(context, classOrMethodName, outcome);都是和后面Spring启动的完了之后,见听到ContextRefreshedEvent这个事件的时候,会将前面所有记录的logs都打印出来。对应的监听器为ConditionEvaluationReportLoggingListener。
以上面分析过的这个类:ServletWebServerFactoryAutoConfiguration为例子,这个类上有两个条件注解:
@ConditionalOnClass(ServletRequest.class)@ConditionalOnWebApplication(type = Type.SERVLET)
ConditionalOnClass
判断某个类是否存在
 1@Target({ ElementType.TYPE, ElementType.METHOD })
 2@Retention(RetentionPolicy.RUNTIME)
 3@Documented
 4@Conditional(OnClassCondition.class)
 5public @interface ConditionalOnClass {
 6
 7	/**
 8	 * The classes that must be present. Since this annotation is parsed by loading class
 9	 * bytecode, it is safe to specify classes here that may ultimately not be on the
10	 * classpath, only if this annotation is directly on the affected component and
11	 * <b>not</b> if this annotation is used as a composed, meta-annotation. In order to
12	 * use this annotation as a meta-annotation, only use the {@link #name} attribute.
13	 * @return the classes that must be present
14	 */
15	Class<?>[] value() default {};
16
17	/**
18	 * The classes names that must be present.
19	 * @return the class names that must be present.
20	 */
21	String[] name() default {};
22
23}
可以看到这个这个注解还是依赖了OnClassCondition,下面进入OnClassCondition类中看一下上面提到的getMatchOutcome()方法是怎么实现的。
 1public ConditionOutcome getMatchOutcome(ConditionContext context, AnnotatedTypeMetadata metadata) {
 2    ClassLoader classLoader = context.getClassLoader();
 3    ConditionMessage matchMessage = ConditionMessage.empty();
 4
 5	// 拿到ConditionalOnClass注解中的value值,也就是判断是否存在ConditionalOnClass中配置的条件类名
 6    List<String> onClasses = getCandidates(metadata, ConditionalOnClass.class);
 7    if (onClasses != null) {
 8
 9        // ☆ ->
10        // 判断onClasses中不存在的类
11        List<String> missing = filter(onClasses, ClassNameFilter.MISSING, classLoader);
12
13        // 如果有缺失的类,那就表示不匹配
14        if (!missing.isEmpty()) {
15            return ConditionOutcome.noMatch(ConditionMessage.forCondition(ConditionalOnClass.class).didNotFind("required class", "required classes").items(Style.QUOTE, missing));
16        }
17
18        // 否则就表示匹配
19        matchMessage = matchMessage.andCondition(ConditionalOnClass.class)
20            .found("required class", "required classes")
21            .items(Style.QUOTE, filter(onClasses, ClassNameFilter.PRESENT, classLoader));
22    }
23
24    // 如果有@ConditionalOnMissingClass注解则继续解析
25    // 和上面类似,只不过是判断onMissingClasses是不是全部缺失,如果是则表示匹配
26    List<String> onMissingClasses = getCandidates(metadata, ConditionalOnMissingClass.class);
27    if (onMissingClasses != null) {
28        List<String> present = filter(onMissingClasses, ClassNameFilter.PRESENT, classLoader);
29        // 判断一下是不是我不想他们存在的那些类都不存在。
30        if (!present.isEmpty()) {
31            return ConditionOutcome.noMatch(ConditionMessage.forCondition(ConditionalOnMissingClass.class).found("unwanted class", "unwanted classes").items(Style.QUOTE, present));
32        }
33        matchMessage = matchMessage.andCondition(ConditionalOnMissingClass.class)
34            .didNotFind("unwanted class", "unwanted classes")
35            .items(Style.QUOTE, filter(onMissingClasses, ClassNameFilter.MISSING, classLoader));
36    }
37    return ConditionOutcome.match(matchMessage);
38}
第6行到第22行是在找到ConditionnalOnClass中配置的且不存在类路径中的类名,采用的事反向的方法,这样可以方便的在记录下来有哪些类是没有加载到的,并记录到log中。
filter(onClasses, ClassNameFilter.MISSING, classLoader);中使用的是ClassNameFilter.MISSING的匹配逻辑。代码如下:
 1protected final List<String> filter(
 2    Collection<String> classNames,
 3    ClassNameFilter classNameFilter,
 4    ClassLoader classLoader
 5) {
 6    if (CollectionUtils.isEmpty(classNames)) {
 7        return Collections.emptyList();
 8    }
 9
10    List<String> matches = new ArrayList<>(classNames.size());
11    for (String candidate : classNames) {
12        if (classNameFilter.matches(candidate, classLoader)) {
13            matches.add(candidate);
14        }
15    }
16    return matches;
17}
18
19
20// matches()方法对应的实现
21protected enum ClassNameFilter {
22
23    // ...
24
25    MISSING {
26        @Override
27        public boolean matches(String className, ClassLoader classLoader) {
28            return !isPresent(className, classLoader);
29        }
30
31    };
32
33    // ...
34
35    static boolean isPresent(String className, ClassLoader classLoader) {
36        if (classLoader == null) {
37            classLoader = ClassUtils.getDefaultClassLoader();
38        }
39        try {
40            resolve(className, classLoader);
41            return true;
42        } catch (Throwable ex) {
43            return false;
44        }
45    }
46
47}
继续回到getMatchOutcome()方法的26~35行,这里是在看,如果当前类的注解上面除了@ConditionalOnClass还有ConditionalOnMissingClass注解,那么就顺便解析了@ConditionalOnMissingClass。这里比较奇怪,为什么在解析@ConditionalOnClass的注解中还去解析一下@ConditionalOnMissingClass这个注解呢,因为如果按照Spring的解析习惯,两个注解分开来的话,那么SpringBootCondtion.matches()方法就会被执行两次,而且这两个注解的内容比较相似,只是判断条件相反,所以可以顺便解析了。
ConditionalOnBean
 1@Target({ ElementType.TYPE, ElementType.METHOD })
 2@Retention(RetentionPolicy.RUNTIME)
 3@Documented
 4@Conditional(OnBeanCondition.class)
 5public @interface ConditionalOnBean {
 6
 7	Class<?>[] value() default {};
 8
 9	String[] type() default {};
10
11	Class<? extends Annotation>[] annotation() default {};
12
13	String[] name() default {};
14
15	SearchStrategy search() default SearchStrategy.ALL;
16
17	Class<?>[] parameterizedContainer() default {};
18
19}
Class<?>[] value() default {}:指定需要存在的 bean 类型,当这些类型的 bean 存在时,加载配置。String[] type() default {}:指定需要存在的 bean 类型名称,以字符串形式表示,当这些类型的 bean 存在时,加载配置。Class<? extends Annotation>[] annotation() default {}:指定需要存在的注解类型,当具有这些注解的 bean 存在时,加载配置。String[] name() default {}:指定需要存在的 bean 名称,当这些名称的 bean 存在时,加载配置。SearchStrategy search() default SearchStrategy.ALL:定义在寻找 bean 时的策略。可以是以下几种:ALL:在当前和所有祖先上下文中查找。CURRENT:仅在当前上下文中查找。ANCESTORS:在当前上下文及其所有祖先上下文中查找。PARENTS:仅在当前上下文的直接父上下文中查找。
Class<?>[] parameterizedContainer() default {}:指定需要存在的参数化容器类型(如List<User>),当这些类型的 bean 存在时,加载配置。
在ConditionalOnMissingBean中还有下面两个属性:
Class<?>[] ignored() default {};:在匹配的时候需要被忽略掉的bean的类型数组。String[] ignoredType() default {};:在匹配的时候需要忽略掉的bean的名字数组。
类似的进入OnBeanCondition.java看个究竟:
OnBeanCondition.java
 1public ConditionOutcome getMatchOutcome(ConditionContext context, AnnotatedTypeMetadata metadata) {
 2    ConditionMessage matchMessage = ConditionMessage.empty();
 3    MergedAnnotations annotations = metadata.getAnnotations();
 4
 5    // 如果存在ConditionalOnBean注解
 6    if (annotations.isPresent(ConditionalOnBean.class)) {
 7        Spec<ConditionalOnBean> spec = new Spec<>(context, metadata, annotations, ConditionalOnBean.class);
 8        MatchResult matchResult = getMatchingBeans(context, spec);
 9
10        // 如果某个Bean不存在
11        if (!matchResult.isAllMatched()) {
12            String reason = createOnBeanNoMatchReason(matchResult);
13
14            // 直接返回
15            return ConditionOutcome.noMatch(spec.message().because(reason));
16        }
17
18        // 所有Bean都存在
19        matchMessage = spec.message(matchMessage).found("bean", "beans").items(Style.QUOTE, matchResult.getNamesOfAllMatches());
20    }
21
22    // 如果存在ConditionalOnSingleCandidate注解
23    if (metadata.isAnnotated(ConditionalOnSingleCandidate.class.getName())) {
24        Spec<ConditionalOnSingleCandidate> spec = new SingleCandidateSpec(context, metadata, annotations);
25        MatchResult matchResult = getMatchingBeans(context, spec);
26
27        // 有的bean没有匹配到(不存在) 直接返回
28        if (!matchResult.isAllMatched()) {
29            return ConditionOutcome.noMatch(spec.message().didNotFind("any beans").atAll());
30        }
31
32        // Bean存在
33        Set<String> allBeans = matchResult.getNamesOfAllMatches();
34
35        // 如果只有一个
36        if (allBeans.size() == 1) {
37            matchMessage = spec.message(matchMessage).found("a single bean").items(Style.QUOTE, allBeans);
38        } else {
39            // 如果有多个, 看一下bean上面是否有@Primary注解
40            List<String> primaryBeans = getPrimaryBeans(context.getBeanFactory(), allBeans, spec.getStrategy() == SearchStrategy.ALL);
41
42            // 没有主Bean,那就不匹配
43            if (primaryBeans.isEmpty()) {
44                return ConditionOutcome.noMatch(spec.message().didNotFind("a primary bean from beans").items(Style.QUOTE, allBeans));
45            }
46
47            // 有多个主Bean,那就不匹配
48            if (primaryBeans.size() > 1) {
49                return ConditionOutcome.noMatch(spec.message().found("multiple primary beans").items(Style.QUOTE, primaryBeans));
50            }
51
52            // 只有一个主Bean
53            matchMessage = spec.message(matchMessage)
54                .found("a single primary bean '" + primaryBeans.get(0) + "' from beans")
55                .items(Style.QUOTE, allBeans);
56        }
57    }
58
59    // 存在 ConditionalOnMissingBean 注解
60    if (metadata.isAnnotated(ConditionalOnMissingBean.class.getName())) {
61        Spec<ConditionalOnMissingBean> spec = new Spec<>(context, metadata, annotations, ConditionalOnMissingBean.class);
62        MatchResult matchResult = getMatchingBeans(context, spec);
63
64        // 有任意一个Bean存在,那就条件不匹配
65        if (matchResult.isAnyMatched()) {
66            String reason = createOnMissingBeanNoMatchReason(matchResult);
67            return ConditionOutcome.noMatch(spec.message().because(reason));
68        }
69
70        // 都不存在在,则匹配
71        matchMessage = spec.message(matchMessage).didNotFind("any beans").atAll();
72    }
73    return ConditionOutcome.match(matchMessage);
74}
从上面的代码中看到和之前的OnClassCondition.java一样,在getMatchOutcome()方法中同事处理了下面三个条件:ConditionalOnBean、ConditionalOnSingleCandidate、ConditionalOnMissingBean。
其他的条件注解和上面提到的两个注解逻辑都是差不多的,只是条件不同。
SpringBoot的自动配置
@EnableAutoConfiguration
 1@Target(ElementType.TYPE)
 2@Retention(RetentionPolicy.RUNTIME)
 3@Documented
 4@Inherited
 5@AutoConfigurationPackage
 6@Import(AutoConfigurationImportSelector.class)
 7public @interface EnableAutoConfiguration {
 8
 9	String ENABLED_OVERRIDE_PROPERTY = "spring.boot.enableautoconfiguration";
10
11	Class<?>[] exclude() default {};
12
13	String[] excludeName() default {};
14
15}
Class<?>[] exclude() default {};:根据类型排除某些自动配置类String[] excludeName() default {};:根据名字排除某些自动配置类
导入了一个AutoConfigurationImportSelector.class这个类。会来执行这个类中的selectImports()方法,内容如下:
 1@Override
 2public String[] selectImports(AnnotationMetadata annotationMetadata) {
 3    // 会在所有@Configuration都解析完了之后才执行, 即在解析完程序员所有的配置类后才会来加载
 4    // springboot自己的自动配置类
 5
 6    if (!isEnabled(annotationMetadata)) {
 7        return NO_IMPORTS;
 8    }
 9
10    // ☆ ->
11    // SPI 获取自动配置类(spring.factories中所导入的)
12    AutoConfigurationEntry autoConfigurationEntry = getAutoConfigurationEntry(annotationMetadata);
13
14    // 这里返回的配置类会按照之前的@Condition...的条件一个一个的匹配是否满足
15    return StringUtils.toStringArray(autoConfigurationEntry.getConfigurations());
16}
进入getAutoConfigurationEntry()方法
 1protected AutoConfigurationEntry getAutoConfigurationEntry(AnnotationMetadata annotationMetadata) {
 2    if (!isEnabled(annotationMetadata)) {
 3        return EMPTY_ENTRY;
 4    }
 5
 6    // 获取@EnableAutoConfiguration的属性
 7    AnnotationAttributes attributes = getAttributes(annotationMetadata);
 8
 9    // 获取spring.factories中所有的AutoConfiguration
10    List<String> configurations = getCandidateConfigurations(annotationMetadata, attributes);
11
12    // 去重(也就是按类名去重)
13    configurations = removeDuplicates(configurations);
14
15    // 获取需要排除的AutoConfiguration,可以通过@EnableAutoConfiguration注解的exclude属性,
16    // 或者spring.autoconfigure.exclude来配置
17    Set<String> exclusions = getExclusions(annotationMetadata, attributes);
18
19    // 排除
20    checkExcludedClasses(configurations, exclusions);
21    configurations.removeAll(exclusions);
22
23    // ☆ ->
24    // 获取spring.factories中的AutoConfigurationImportFilter对AutoConfiguration进行过滤
25    // 默认会拿到OnBeanCondition、OnClassCondition、OnWebApplicationCondition
26    // 这三个会去判断上面的AutoConfiguration是否符合它们自身所要求的条件,不符合的会过滤掉,表示不会进行解析了
27    // 会利用spring-autoconfigure-metadata.properties中的配置来进行过滤
28    // spring-autoconfigure-metadata.properties文件中的内容是利用Java中的AbstractProcessor技术在[编译]时生成出来的
29    configurations = getConfigurationClassFilter().filter(configurations);
30
31    // configurations表示合格的,exclusions表示被排除的,
32    // 把它们记录在ConditionEvaluationReportAutoConfigurationImportListener中
33    fireAutoConfigurationImportEvents(configurations, exclusions);
34
35    // 最后返回的AutoConfiguration都是符合条件的
36    return new AutoConfigurationEntry(configurations, exclusions);
37}
getCandidateConfigurations(annotationMetadata, attributes);,这个方法会读取所有的spring.factories内容。
 1	private static Map<String, List<String>> loadSpringFactories(ClassLoader classLoader) {
 2		Map<String, List<String>> result = cache.get(classLoader);
 3		// ...
 4		try {
 5			Enumeration<URL> urls = classLoader.getResources(FACTORIES_RESOURCE_LOCATION);
 6			// ...
 7
 8			// Replace all lists with unmodifiable lists containing unique elements
 9			result.replaceAll((factoryType, implementations) -> implementations.stream().distinct()
10					.collect(Collectors.collectingAndThen(Collectors.toList(), Collections::unmodifiableList)));
11			cache.put(classLoader, result);
12		} catch (IOException ex) {
13			// ...
14		}
15		return result;
16	}
先从缓存中拿,如果没有拿到,就会从指定的位置(FACTORIES_RESOURCE_LOCATION = "META-INF/spring.factories")读取,最后在存储到缓存中中。
拿到了这些自动配置类了之后还有走前面说过的过滤逻辑,getConfigurationClassFilter().filter(configurations);是通过这一行代码来实现的,这行代码有两个作用,第一个是获取ClassFilter:
 1private ConfigurationClassFilter getConfigurationClassFilter() {
 2    if (this.configurationClassFilter == null) {
 3        List<AutoConfigurationImportFilter> filters = getAutoConfigurationImportFilters();
 4        for (AutoConfigurationImportFilter filter : filters) {
 5            invokeAwareMethods(filter);
 6        }
 7        this.configurationClassFilter = new ConfigurationClassFilter(this.beanClassLoader, filters);
 8    }
 9    return this.configurationClassFilter;
10}
11
12getAutoConfigurationImportFilters();
在通过getAutoConfigurationImportFilters();
1protected List<AutoConfigurationImportFilter> getAutoConfigurationImportFilters() {
2    return SpringFactoriesLoader.loadFactories(AutoConfigurationImportFilter.class, this.beanClassLoader);
3}
这个方法会从spring.factories中获取AutoConfigurationImportFilter对应的自动配置类:
1# Auto Configuration Import Filters
2org.springframework.boot.autoconfigure.AutoConfigurationImportFilter=\
3org.springframework.boot.autoconfigure.condition.OnBeanCondition,\
4org.springframework.boot.autoconfigure.condition.OnClassCondition,\
5org.springframework.boot.autoconfigure.condition.OnWebApplicationCondition
获取到这三个条件类之后,就会调用filter()方法:
AutoConfigurationImportSelector.ConfigurationClassFilter
 1List<String> filter(List<String> configurations) {
 2    long startTime = System.nanoTime();
 3    String[] candidates = StringUtils.toStringArray(configurations);
 4    boolean skipped = false;
 5    for (AutoConfigurationImportFilter filter : this.filters) {
 6
 7        // ☆ ->
 8        boolean[] match = filter.match(candidates, this.autoConfigurationMetadata);
 9        for (int i = 0; i < match.length; i++) {
10            if (!match[i]) {
11                candidates[i] = null;
12                skipped = true;
13            }
14        }
15    }
16    if (!skipped) {
17        return configurations;
18    }
19    List<String> result = new ArrayList<>(candidates.length);
20    for (String candidate : candidates) {
21        if (candidate != null) {
22            result.add(candidate);
23        }
24    }
25    if (logger.isTraceEnabled()) {
26        int numberFiltered = configurations.size() - result.size();
27        logger.trace("Filtered " + numberFiltered + " auto configuration class in "
28                     + TimeUnit.NANOSECONDS.toMillis(System.nanoTime() - startTime) + " ms");
29    }
30    return result;
31}
32
33}
在第8行,调用match()方法之后进入下面
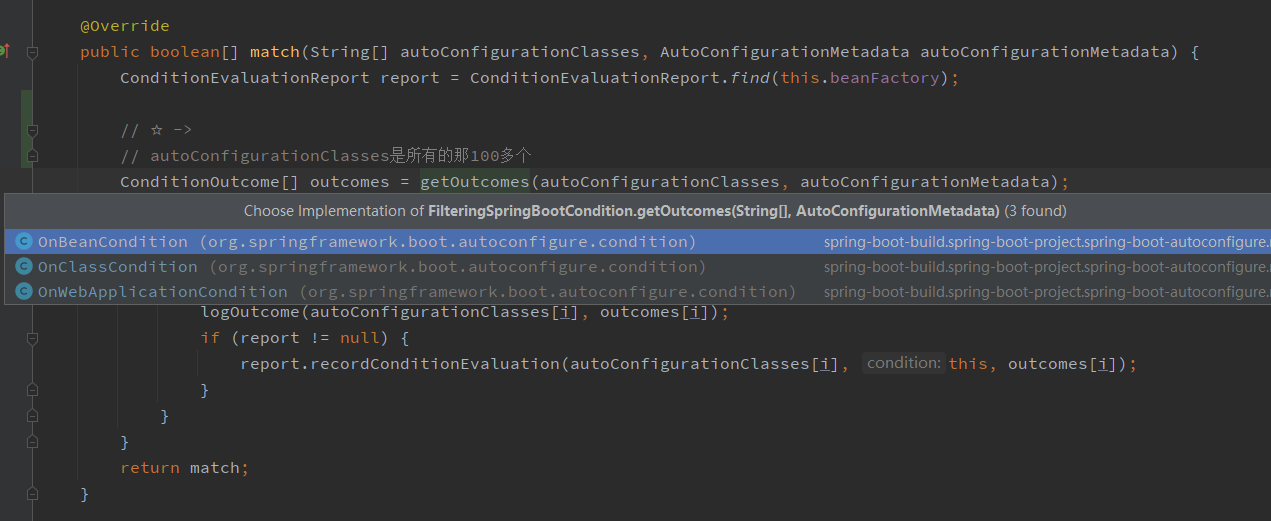
FilteringSpringBootCondition.java
 1@Override
 2public boolean[] match(String[] autoConfigurationClasses, AutoConfigurationMetadata autoConfigurationMetadata) {
 3    ConditionEvaluationReport report = ConditionEvaluationReport.find(this.beanFactory);
 4
 5    // ☆ ->
 6    // autoConfigurationClasses是所有的那100多个
 7    ConditionOutcome[] outcomes = getOutcomes(autoConfigurationClasses, autoConfigurationMetadata);
 8    boolean[] match = new boolean[outcomes.length];
 9    for (int i = 0; i < outcomes.length; i++) {
10        match[i] = (outcomes[i] == null || outcomes[i].isMatch());
11        if (!match[i] && outcomes[i] != null) {
12            logOutcome(autoConfigurationClasses[i], outcomes[i]);
13            if (report != null) {
14                report.recordConditionEvaluation(autoConfigurationClasses[i], this, outcomes[i]);
15            }
16        }
17    }
18    return match;
19}
上面getOutcomnes()方法,在OnBeanCondition、OnClassCondition、OnWebApplicationCondition中有实现,如下图所示。
这里以OnClassCondition为例子来看一下,
 1@Override
 2protected final ConditionOutcome[] getOutcomes(
 3    String[] autoConfigurationClasses,
 4    AutoConfigurationMetadata autoConfigurationMetadata
 5) {
 6    if (autoConfigurationClasses.length > 1 && Runtime.getRuntime().availableProcessors() > 1) {
 7        // 如果是多核的会采用多线程去处理
 8        return resolveOutcomesThreaded(autoConfigurationClasses, autoConfigurationMetadata);
 9    } else {
10        OutcomesResolver outcomesResolver = new StandardOutcomesResolver(autoConfigurationClasses, 0,
11                                                                         autoConfigurationClasses.length, autoConfigurationMetadata, getBeanClassLoader());
12        return outcomesResolver.resolveOutcomes();
13    }
14}
15
16
17private ConditionOutcome[] resolveOutcomesThreaded(
18    String[] autoConfigurationClasses,
19    AutoConfigurationMetadata autoConfigurationMetadata
20) {
21    int split = autoConfigurationClasses.length / 2;
22    OutcomesResolver firstHalfResolver = createOutcomesResolver(autoConfigurationClasses, 0, split, autoConfigurationMetadata);
23    OutcomesResolver secondHalfResolver = new StandardOutcomesResolver(autoConfigurationClasses, split, autoConfigurationClasses.length, autoConfigurationMetadata, getBeanClassLoader());
24    ConditionOutcome[] secondHalf = secondHalfResolver.resolveOutcomes();
25    ConditionOutcome[] firstHalf = firstHalfResolver.resolveOutcomes();
26    ConditionOutcome[] outcomes = new ConditionOutcome[autoConfigurationClasses.length];
27    System.arraycopy(firstHalf, 0, outcomes, 0, firstHalf.length);
28    System.arraycopy(secondHalf, 0, outcomes, split, secondHalf.length);
29    return outcomes;
30}
这里为了加快筛选的速度,采用了多线程的去处理的做法,将读取到的自动配置分成了2个数组,主线程调用join的方式等待同步,加快处理速度。
在上面的resolveOutcomes()方法中会对条件进行过滤,一直跟着getOutcome()方法往下走,可以看到如下代码:
1private ConditionOutcome getOutcome(String className, ClassLoader classLoader) {
2    if (ClassNameFilter.MISSING.matches(className, classLoader)) {
3        return ConditionOutcome.noMatch(ConditionMessage.forCondition(ConditionalOnClass.class)
4                                        .didNotFind("required class").items(Style.QUOTE, className));
5    }
6    return null;
7}
从这里可以看出来,我们看到现在的代码只是对spring.factories中条件进行初步的过滤,对于我们看到的OnClasssCondtion,它只会保留满足ConditionalOnClass.class这种条件注解的自动配置。
后面才对进行我们最上面分析的其他条件注解的过滤。